Troubleshooting: Service Professionals
Go through the checklist below in order. If the unit is still not functioning properly, please fill out the form which will includes some specific diagnostic information. Our technician will review and follow up with you in a timely manner. Thank you.
1. Power
- Make sure breaker(s) are on at the dwelling’s main panel.
- Make sure all 4 internal breakers on the unit are in the on position (pushed to right and showing red).
2. kW Setting: DIP Switches
- Make sure the DIP switches are in the correct position for the desired kW setting based on the electrical wire gauge and breaker size. Download our DIP Switch reference sheet below to complete this step.
3. Startup / Lockout
- With all breakers turned on, the controller powers up and the LCD screen displays the Startup screen for approximately 4 seconds.
- Open a hot water tap that produces a minimum of 1GPM inside the home and allow it to flow for a minimum of two (2) minutes to purge air from HEX and protect unit from dry fire. The trutankless unit must sense active water flow before it will allow the elements to heat. The LCD screen will be in lockout mode for a period of 120 seconds (2 minutes) while the water fills the heating tubes completely and the startup sequence completes.
- This information is covered on page 22 of the User Guide that came with the unit and can also be dowloaded on the Service Professionals page of our site in the Digital Toolbox section.
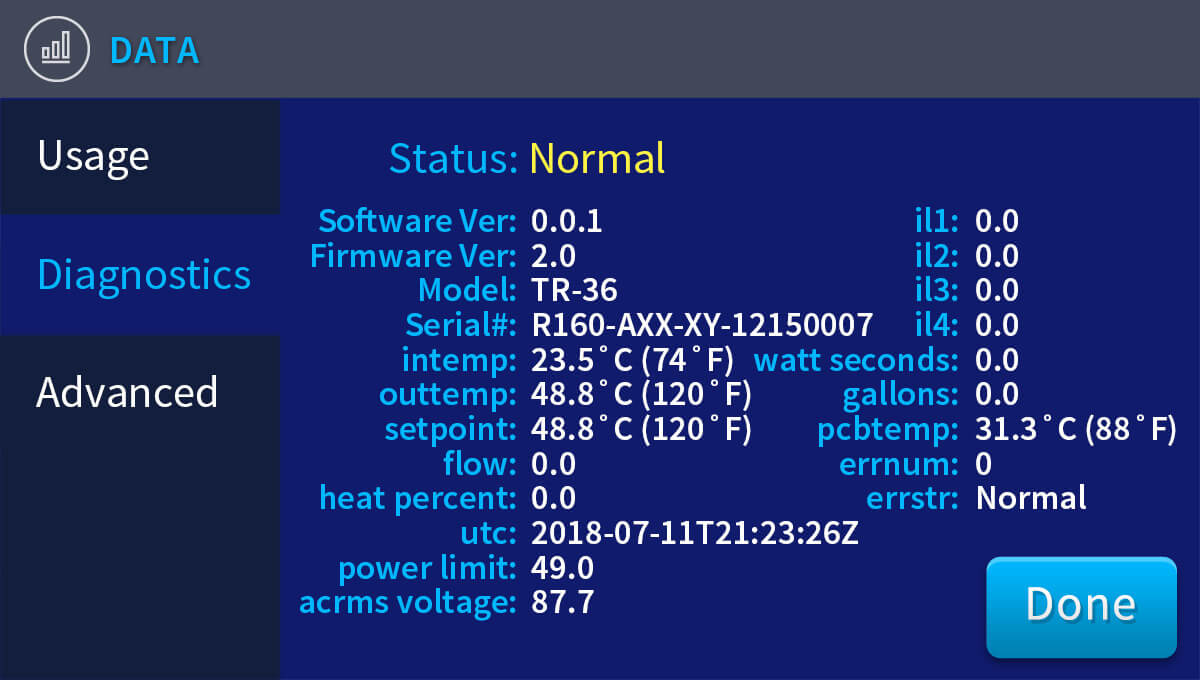
4. Diagnostic Screen
- You can access the diagnostic screen for further information on the status of the unit.
- From the home screen, tap the Diagnostics icon (bar graph).
- Tap the diagnostics tab to reveal the screen shown below.
- Check the “Status” and “Errstr” message for any errors.
5. Submit Diagnostic Data to trutankless®
If the unit is still not functioning properly, please fill out the form below for our technician to review. This will help us determine the necessary action needed to resolve the issue.